ISEA
Depuración de augas residuais (manual en inglés)
Arquivo · 2012 Pode non estar ao día; pregúntanos antes de decidir.
Desliza para pasar de páxina
Para ver a páxina tal como está no catálogo, ábrea no PDF. Abrir o PDF na páxina 50
Texto da páxina 50
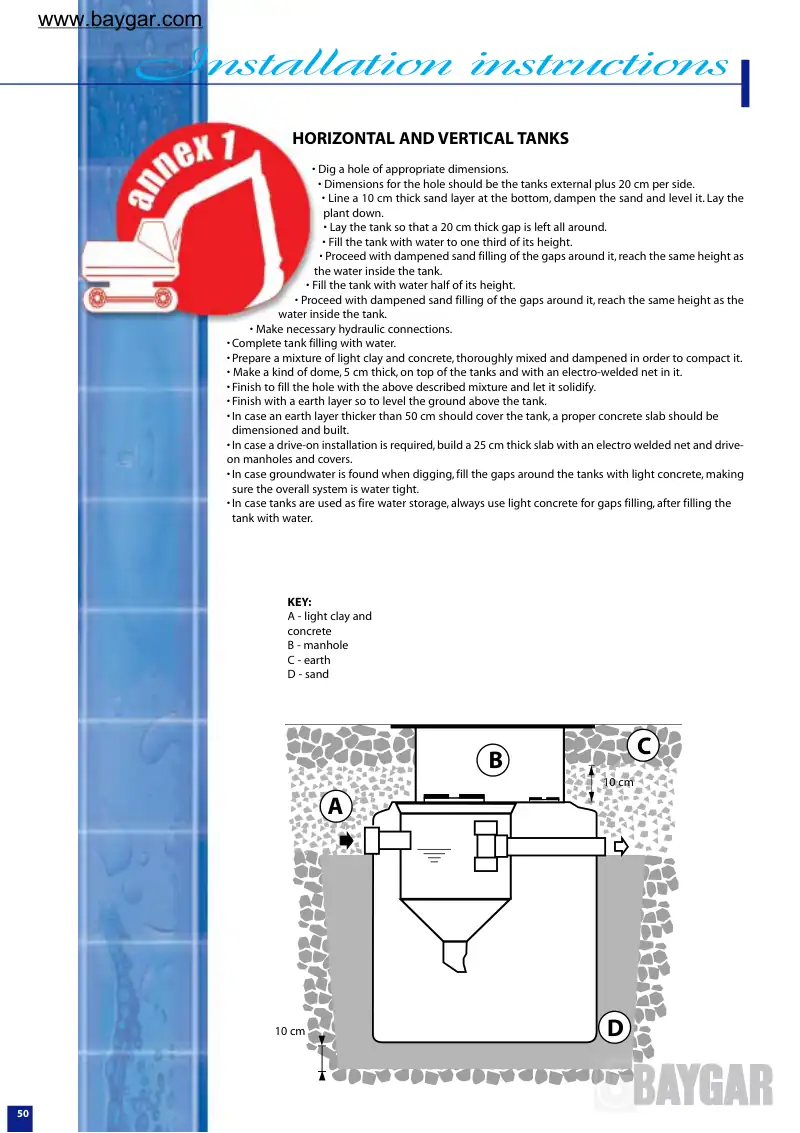
Installation instructions HORIZONTAL AND VERTICAL TANKS • Dig a hole of appropriate dimensions. • Dimensions for the hole should be the tanks external plus 20 cm per side. • Line a 10 cm thick sand layer at the bottom, dampen the sand and level it. Lay the plant down. • Lay the tank so that a 20 cm thick gap is left all around. • Fill the tank with water to one third of its height. • Proceed with dampened sand filling of the gaps around it,reach the same height as the water inside the tank. • Fill the tank with water half of its height. • Proceed with dampened sand filling of the gaps around it, reach the same height as the water inside the tank. • Make necessary hydraulic connections. •Complete tank filling with water. •Prepare a mixture of light clay and concrete, thoroughly mixed and dampened in order to compact it. • Make a kind of dome, 5 cm thick, on top of the tanks and with an electro-welded net in it. •Finish to fill the hole with the above described mixture and let it solidify. •Finish with a earth layer so to level the ground above the tank. •In case an earth layer thicker than 50 cm should cover the tank, a proper concrete slab should be dimensioned and built. •In case a drive-on installation is required,build a 25 cm thick slab with an electro welded net and drive- on manholes and covers. •In case groundwater is found when digging, fill the gaps around the tanks with light concrete, making sure the overall system is water tight. •In case tanks are used as fire water storage, always use light concrete for gaps filling, after filling the tank with water. 50 KEY: A - light clay and concrete B - manhole C - earth D - sand 10 cm 10 cm A B C D www.baygar.com